Golang 编写爬虫
0x01 前言 学习用 golang 编写爬虫,先从一些简单的知识开始,再学习如何编写爬虫。文章大部分内容是参考自 https://strconv.com/posts/
所有代码可以在这里浏览
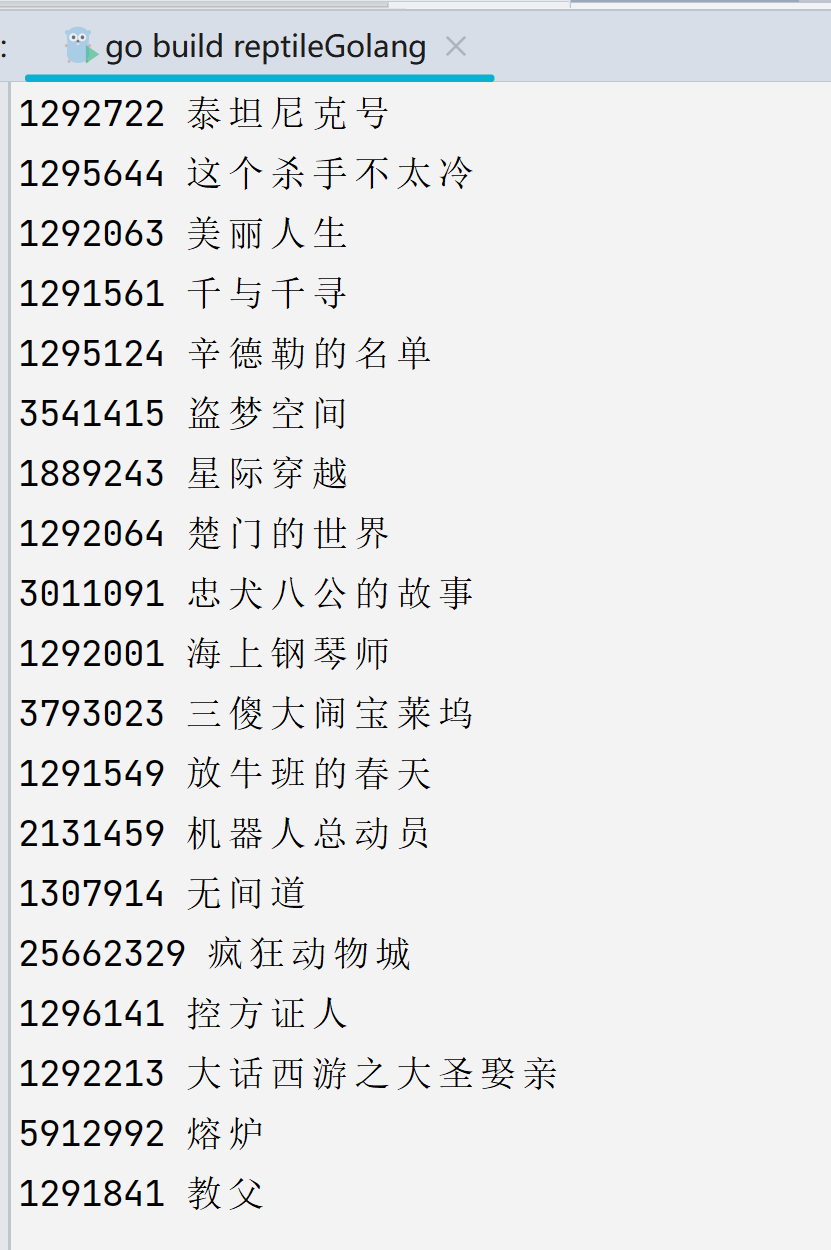
0x02 基础爬取 爬取豆瓣 Top250 基础代码 尝试爬取一下豆瓣 Top250 的
Golang 语言的 HTTP 请求库不需要使用第三方的库,标准库就内置了足够好的支持:
1
2
3
4
5
6
7
8
9
10
11
12
13
14
15
16
17
18
19
20
21
22
23
24
25
26
27
28
import ( "fmt" "net/http" "io/ioutil" ) func fetch (url string ) string { fmt.Println("Fetch Url" , url) client := &http.Client{} req, _ := http.NewRequest("GET" , url, nil ) req.Header.Set("User-Agent" , "Mozilla/5.0 (compatible; Googlebot/2.1; +http://www.google.com/bot.html)" ) resp, err := client.Do(req) if err != nil { fmt.Println("Http get err:" , err) return "" } if resp.StatusCode != 200 { fmt.Println("Http status code:" , resp.StatusCode) return "" } defer resp.Body.Close() body, err := ioutil.ReadAll(resp.Body) if err != nil { fmt.Println("Read error" , err) return "" } return string (body) }
1 req, _ := http.NewRequest("GET" , url, nil )
通过 body, err := ioutil.ReadAll(resp.Body) 读取 response 的 body 内容,最后用 string(body) 转化为字符串,后续能够被我们所解析
接着就是解析页面的部分,本质还是根据 HTML 标签来抓取的
1
2
3
4
5
6
7
8
9
10
11
12
13
14
15
16
17
import ( "regexp" "strings" ) func parseUrls (url string ) body := fetch(url) body = strings.Replace(body, "\n" , "" , -1 ) rp := regexp.MustCompile(`<div class="hd">(.*?)</div>` ) titleRe := regexp.MustCompile(`<span class="title">(.*?)</span>` ) idRe := regexp.MustCompile(`<a href="https://movie.douban.com/subject/(\d+)/"` ) items := rp.FindAllStringSubmatch(body, -1 ) for _, item := range items { fmt.Println(idRe.FindStringSubmatch(item[1 ])[1 ], titleRe.FindStringSubmatch(item[1 ])[1 ]) } }
这篇文章我们主要体验用标准库完成页面的解析,也就是用正则表达式包regexp来完成。不过要注意需要用 strings.Replace(body, "\n", "", -1) 这步把 body 内容中的回车符去掉,要不然下面的正则表达式.*就不符合了。FindAllStringSubmatch 方法会把符合正则表达式的结果都解析出来(一个列表),而 FindStringSubmatch 是找第一个符合的结果。
因为是 Top250 的页面,所有电影是需要进行翻页爬取的,而豆瓣的第二页是 start=25,第三页是 start=50,我们只需要写个循环,让 i*25 作为后面的参数即可。用到的函数是 strconv.Itoa,这个函数可以将数值转换为字符串
1
2
3
4
5
6
7
8
func main () start := time.Now() for i := 0 ; i < 10 ; i++ { parseUrls("https://movie.douban.com/top250?start=" + strconv.Itoa(25 *i)) } elapsed := time.Since(start) fmt.Printf("Took %s" , elapsed) }
完整代码如下
1
2
3
4
5
6
7
8
9
10
11
12
13
14
15
16
17
18
19
20
21
22
23
24
25
26
27
28
29
30
31
32
33
34
35
36
37
38
39
40
41
42
43
44
45
46
47
48
49
50
package main import ( "fmt" "io/ioutil" "net/http" "regexp" "strconv" "strings" "time" ) func fetch (url string ) string { fmt.Println("Fetch Url" , url) client := &http.Client{} req, _ := http.NewRequest("GET" , url, nil ) req.Header.Set("User-Agent" , "Mozilla/4.0 (compatible; MSIE 6.0; Windows NT 5.1)" ) resp, err := client.Do(req) if err != nil { fmt.Println("Http get err:" , err) return "" } if resp.StatusCode != 200 { fmt.Println("Http status code:" , resp.StatusCode) return "" } defer resp.Body.Close() body, err := ioutil.ReadAll(resp.Body) if err != nil { fmt.Println("Read error" , err) return "" } return string (body) } func parseUrls (url string ) body := fetch(url) body = strings.Replace(body, "\n" , "" , -1 ) rp := regexp.MustCompile(`<div class="hd">(.*?)</div>` ) titleRe := regexp.MustCompile(`<span class="title">(.*?)</span>` ) idRe := regexp.MustCompile(`<a href="https://movie.douban.com/subject/(\d+)/"` ) items := rp.FindAllStringSubmatch(body, -1 ) for _, item := range items { fmt.Println(idRe.FindStringSubmatch(item[1 ])[1 ], titleRe.FindStringSubmatch(item[1 ])[1 ]) } } func main () start := time.Now() for i := 0 ; i < 10 ; i++ { parseUrls("https://movie.douban.com/top250?start=" + strconv.Itoa(25 *i)) } elapsed := time.Since(start) fmt.Printf("Took %s" , elapsed) }
增加并发功能 并发功能是由 goalng 的 goroutine 库来完成的
上面我们写的爬虫是一个串行的爬虫,效率很低,所以我们在这一环节将它改成并发的。由于这个程序只抓取 10 个页面,大概 1s 多就完成了,为了对比我们先给之前的 doubanCrawler1.go 加一点Sleep的代码,让它跑的慢一些,当然增加抓取的网页也可以。
1
2
3
4
func parseUrls (url string ) ... time.Sleep(2 * time.Second) }
现在我们运行一下,总耗时明显变长了
接着我们通过并发开始让它变得更快
goroutine 的错误用法 先修改成用 Go 原生支持的并发方案 goroutine 来做。在 Golang 中使用 goroutine 非常方便,直接使用 go 关键字就可以,我们看一个版本:
1
2
3
4
5
6
7
8
func main () start := time.Now() for i := 0 ; i < 10 ; i++ { go parseUrls("https://movie.douban.com/top250?start=" + strconv.Itoa(25 *i)) } elapsed := time.Since(start) fmt.Printf("Took %s" , elapsed) }
就是在 parseUrls 函数前加了go 关键字。但其实这样就是不对的,运行的话不会抓取到任何结果。因为协程刚生成,整个程序就结束了,goroutine 还没抓完呢。怎么办呢?可以结束前 Sleep 一个时间,这个时间应该要大于所有 goroutine 执行最慢的那个,这样就保证了全部协程都能正常运行完再结束
1
2
3
4
5
6
7
8
9
func main () start := time.Now() for i := 0 ; i < 10 ; i++ { go parseUrls("https://movie.douban.com/top250?start=" + strconv.Itoa(25 *i)) } time.Sleep(4 * time.Second) elapsed := time.Since(start) fmt.Printf("Took %s" , elapsed) }
在for循环后加了Sleep 4秒。运行一下:
最终运行时间
1
2
Took 4.0063611 s Process finished with the exit code 0
这比起之前来说是快了很多了
当然这个 Sleep 的时间不好控制,假设某次请求花的时间超了,总体时间超过 4s 程序结束了但这个协程其实还没运行结束;而假如全部 goroutine 都在 3 秒(2秒固定Sleep+1秒程序运行)结束,那么多Sleep的一秒就浪费了(当然自己一些小工具的开发可能并不会涉及这些东西,但是这是很基础的业务型编程思维
goroutine 的正确用法 那怎么用 goroutine 呢?有没有像 Python 多进程/线程的那种等待子进/线程执行完的 join 方法呢?当然是有的,可以让 Go 协程之间信道(channel)进行通信:从一端发送数据,另一端接收数据,信道需要发送和接收配对,否则会被阻塞:
1
2
3
4
5
6
7
8
9
10
11
12
13
14
15
16
17
18
19
func parseUrls (url string , ch chan bool ) ... ch <- true } func main () start := time.Now() ch := make (chan bool ) for i := 0 ; i < 10 ; i++ { go parseUrls("https://movie.douban.com/top250?start=" +strconv.Itoa(25 *i), ch) } for i := 0 ; i < 10 ; i++ { <-ch } elapsed := time.Since(start) fmt.Printf("Took %s" , elapsed) }
在上面的改法中,parseUrls 都是在 goroutine 中执行,但是注意函数签名改了,多接收了信道参数ch。当函数逻辑执行结束会给信道 ch 发送一个布尔值。
而在 main 函数中,在用一个 for 循环,<- ch 会等待接收数据(这里只是接收,相当于确认任务完成)。这样的流程就实现了一个更好的并发方案:
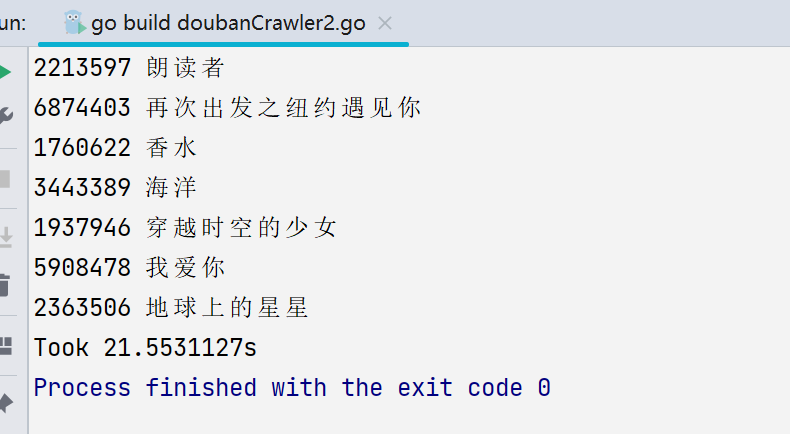
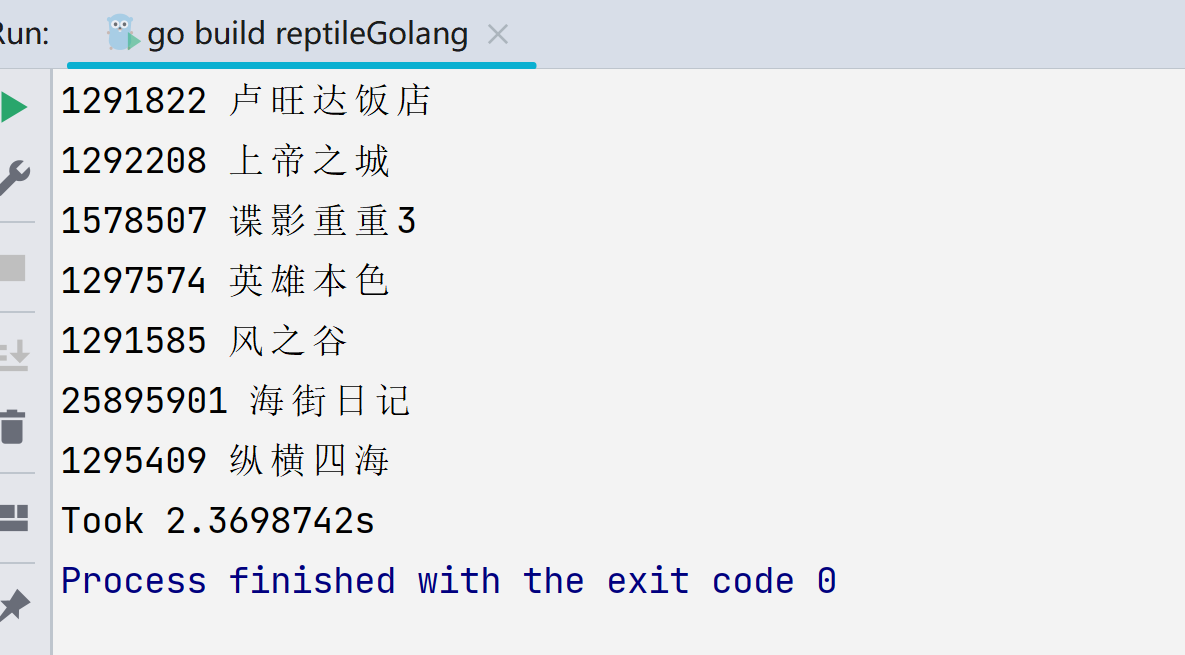
最终运行结果如图,快了很多
sync.WaitGroup 还有一个好的方案 sync.WaitGroup。我们这个程序只是打印抓到的对应内容,所以正好用 WaitGroup:等待一组并发操作完成
1
2
3
4
5
6
7
8
9
10
11
12
13
14
15
16
17
18
19
20
21
22
import ( ... "sync" ) ... func main () start := time.Now() var wg sync.WaitGroup wg.Add(10 ) for i := 0 ; i < 10 ; i++ { go func (i int ) defer wg.Done() parseUrls("https://movie.douban.com/top250?start=" +strconv.Itoa(25 *i)) }(i) } wg.Wait() elapsed := time.Since(start) fmt.Printf("Took %s" , elapsed) }
一开始我们给调用 wg.Add 添加要等待的 goroutine 量,我们的页面总数就是 10,所以这里可以直接写出来。
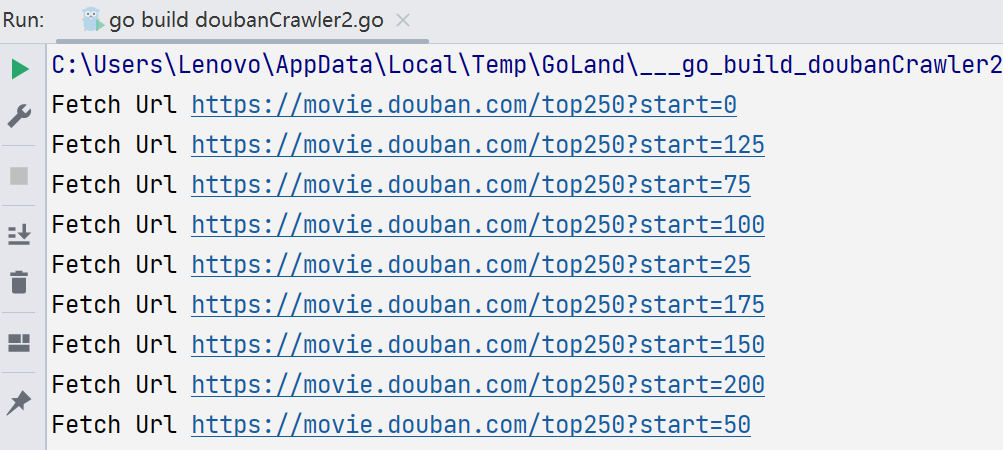
另外这里使用了 defer 关键字来调用 wg.Done,以确保在退出 goroutine 的闭包之前,向 WaitGroup表明了我们已经退出。由于要执行 wg.Done 和 parseUrls2 件事,所以不能直接用 go 关键字,需要把语句包一下。不过要注意,在闭包中需要把参数i作为 func 的参数传入,要不然 i 会使用最后一次循环的那个值:
1 2 3 4 5 6 7 8 9 10 11 12 13 14 15 16 17 18 19 for i := 0 ; i < 10 ; i++ { go func () defer wg.Done() parseUrls("https://movie.douban.com/top250?start=" +strconv.Itoa(25 *i)) }() } ❯ go run crawler/doubanCrawler5.go Fetch Url https: Fetch Url https: Fetch Url https: Fetch Url https: Fetch Url https: Fetch Url https: Fetch Url https: Fetch Url https: Fetch Url https: Fetch Url https: ...
在这样的用法中,WaitGroup 相当于是一个协程安全的并发计数器:调用 Add 增加计数,调用 Done 减少计数。调用 Wait 会阻塞并等待至计数器归零。这样也实现了并发和等待全部 goroutine 执行完成:
1
2
Took 2.2960197 s Process finished with the exit code 0
0x03 使用 goquery 在写爬虫的时候,想要对 HTML 内容进行选择和查找匹配时通常是不直接写正则表达式的:因为正则表达式可读性和可维护性比较差。用 Python 写爬虫这方面可选择的方案非常多了,其中有一个被开发者常用的库 pyquery,而 Golang 也有对应的 goquery,可以说 goquery 是 jQuery 的 Golang 版本实现。借用jQueryCSS选择器的语法可以非常方便的实现内容匹配和查找。
安装 goquerys
1 go get github.com/PuerkitoBio/goquery
当然在 Goland 里面导入也可
创建文档 goquery 向外暴露的结构主要是 goquery.Document,一般是由2种方法创建的:
1
2
doc, error := goquery.NewDocumentFromReader(reader io.Reader) doc, error := goquery.NewDocument(url string )
第二种直接传入了 url,但是往往我们会对请求做很多定制(如添加头信息、设置 Cookie 等),所以常用的是第一种方法,我们的代码也要做对应的改动
1
2
3
4
5
6
7
8
9
10
11
12
13
14
15
16
17
18
import ( "fmt" "log" "net/http" "strconv" "time" "github.com/PuerkitoBio/goquery" ) func fetch (url string ) ... defer resp.Body.Close() doc, err := goquery.NewDocumentFromReader(res.Body) if err != nil { log.Fatal(err) } return doc
之前是把 res.Body 转成字符返回,现在直接返回 goquery.Document 类型的 doc 了
CSS 选择器
这里说 CSS 选择器的原因是因为 doc.find,也就是 goquery.Document.find() 其中的参数就是需要通过 CSS 选择器来完成的,我们可以先来看一下豆瓣 TOP250 单个条目的源代码
1 2 3 4 5 6 7 8 9 10 11 12 13 14 15 16 17 <ol class ="grid_view" > <li > <div class ="item" > <div class ="info" > <div class ="hd" > <a href ="https://movie.douban.com/subject/1292052/" class ="" > <span class ="title" > 肖申克的救赎</span > <span class ="title" > / The Shawshank Redemption</span > <span class ="other" > / 月黑高飞(港) / 刺激1995(台)</span > </a > <span class ="playable" > [可播放]</span > </div > </div > </div > </li > .... </ol >
我们这里需要的元素只是电影名,所以如果要用 CSS 选择器的话就要这样写 doc.find() 的语句
1
2
3
4
5
6
7
8
9
func parseUrls (url string , ch chan bool ) doc := fetch(url) doc.Find("ol.grid_view li" ).Find(".hd" ).Each(func (index int , ele *goquery.Selection) movieUrl, _ := ele.Find("a" ).Attr("href" ) fmt.Println(strings.Split(movieUrl, "/" )[4 ], ele.Find(".title" ).Eq(0 ).Text()) }) time.Sleep(2 * time.Second) ch <- true }
doc.Find() 的参数就是 css 选择器,而且 Find 支持链式调用。这里的代码含义是先找 ”grid_view” 的所有 ol 下的 li 元素,然后再找 li 元素里面以 hd 为名字的元素(看上面的HTML 可以知道是 div)。Find 找到的结果是列表,需要使用 Each 方法循环获得,可以传递一个包含索引 index 和子元素 ele 参数的函数,获得具体内容的逻辑就在这个函数中。
在上面的例子中,类名叫做 title 的 span 一共有2个,所以需要取第一个(用 Eq(0)),Text 方法可以获得元素的内容。而获得条目 ID 的方法是先拿到条目页面链接(用 Attr 获得 href 属性,注意,它返回2个参数,第一个是属性值,第二是是否存在这个属性)。这样就拿到了 ID 和标题了
PS:其实爬虫练习的目的已经达到了,获得更多内容就是多写些逻辑罢了。
0x04 使用 soup 这个库实际上就是类似于 Python 的 BS4 库 ———— BeautifulSoup
我们也来尝试写一下 golang 里面的 Soup 库
安装 soup soup 是第三方库,需要手动安装:
1 go get github.com/anaskhan96/soup
同样,也可以在 Goland 里面安装
使用 soup 我们可以先写一个最简单的 GET 请求,大致代码如下
1
2
3
4
5
6
7
8
9
10
11
12
13
14
15
16
17
18
19
20
21
22
23
import ( "fmt" "log" "strconv" "strings" "time" "github.com/anaskhan96/soup" ) func fetch (url string ) fmt.Println("Fetch Url" , url) soup.Headers = map [string ]string { "User-Agent" : "Mozilla/5.0 (compatible; Googlebot/2.1; +http://www.google.com/bot.html)" , } source, err := soup.Get(url) if err != nil { log.Fatal(err) } doc := soup.HTMLParse(source) return doc }
这次不再用内置的 net/http 这个包了。soup 支持直接设置 Headers(以及 Cookies)的值,也可以实现自定义头信息和 Cookie,然后就可以 soup.Get(url) 了,然后用 soup.HTMLParse 就可以获得文档对象了,这其实也就是 goquery 中的 doc
相比起 goquery 不同的是,这里我们要将代码逻辑修改为应用 soup 库的,所以大体上还是差不多的。
1
2
3
4
5
6
7
8
9
10
func parseUrls (url string , ch chan bool ) doc := fetch(url) for _, root := range doc.Find("ol" , "class" , "grid_view" ).FindAll("div" , "class" , "hd" ) { movieUrl, _ := root.Find("a" ).Attrs()["href" ] title := root.Find("span" , "class" , "title" ).Text() fmt.Println(strings.Split(movieUrl, "/" )[4 ], title) } time.Sleep(2 * time.Second) ch <- true }
可以感受到和 goquery 都用了 Find 这个方法名字,但是参数形式不一样,需要传递三个:「标签名」、「类型」、「具体值」。如果有多个可以使用 FindAll (Find是找第一个)。如果不是很多可以使用多次的 Find,或者循环。如果想要找属性的值需要用 Attrs 方法,从 map 里面获得。
获得文本还是用 Text 方法。另外它内有 goquery 那样的 Each 方法,需要手动写一个 for range 格式的循环。
0x05 使用 XPath 在这个系列文章里面已经介绍了 BeautifulSoup 的替代库 soup 和 Pyquery 的替代库goquery,但其实很多人写 Python 爬虫最愿意用的页面解析组合是 lxml+XPath 。为什么呢?先分别说一下 lxml 和 XPath 的优势吧
lxml lxml 是 HTML/XML 的解析器,它用 C 语言实现的 libxml2 和l ibxslt 的Python 绑定。除了效率高,还有一个特点是文档容错能力强。
XPath
最早我自己写 Python 爬虫接触的就是这个,搞了好久才搞懂(当时巨菜无比);刚接触时会感觉无比难,现在回过头来看感觉还行
XPath全称XML Path Language,也就是XML路径语言,是一门在XML文档中查找信息的语言,最初是用来搜寻XML文档的,但是它同样适用于HTML文档的搜索。通过编写对应的路径表达式或者使用内置的标准函数,可以方便的直接获取到想要的任何内容,不用像soup和goquery那样要用Find方法链式的找节点再用Text之类的方法或者对应的值(也就是一句代码就拿到结果了 ),这就是它的特点和优势,而lxml正好支持XPath,所以lxml+XPath一直是我写爬虫的首选。
XPath与BeautifulSoup(soup)、Pyquery(goquery)相比,学习曲线要高一些,但是学会它是非常有价值的,你会爱上它。你看我现在,原来用Python写爬虫学会了XPath,现在可以直接找支持XPath的库直接用了。
另外说一点,如果你非常喜欢 BeautifulSoup,一定要选择 BeautifulSoup+lxml 这个组合,因为 BeautifulSoup 默认的 HTML 解析器用的是 Python 标准库中的 html.parser,虽然文档容错能力也很强,但是效率会差很多。
我学习XPath是通过w3school,参考链接 https://www.w3school.com.cn/xpath/xpath_intro.asp
Golang 中的 Xpath 库 用 Golang 写的 Xpath 库是很多的,由于我还没有什么实际开发经验,所以能搜到的几个库都试用一下,然后再出结论吧。
首先把豆瓣 Top250 的部分 HTML 代码贴出来
1 2 3 4 5 6 7 8 9 10 11 12 13 14 15 16 17 <ol class ="grid_view" > <li > <div class ="item" > <div class ="info" > <div class ="hd" > <a href ="https://movie.douban.com/subject/1292052/" class ="" > <span class ="title" > 肖申克的救赎</span > <span class ="title" > / The Shawshank Redemption</span > <span class ="other" > / 月黑高飞(港) / 刺激 1995(台)</span > </a > <span class ="playable" > [可播放]</span > </div > </div > </div > </li > .... </ol >
还是原来的需求:获得条目 ID 和标题
lestrrat-go/libxml2 是一个 libxml2 的 Golang 绑定库
我们先用 lestrrat-go/libxml2 写一段简单的 HTTP 发包
1
2
3
4
5
6
7
8
9
10
11
12
13
14
15
16
17
18
19
20
21
22
23
24
25
26
27
28
29
30
31
import ( "log" "time" "strings" "strconv" "net/http" "github.com/lestrrat-go/libxml2" "github.com/lestrrat-go/libxml2/types" "github.com/lestrrat-go/libxml2/xpath" ) func fetch (url string ) log.Println("Fetch Url" , url) client := &http.Client{} req, _ := http.NewRequest("GET" , url, nil ) req.Header.Set("User-Agent" , "Mozilla/5.0 (compatible; Googlebot/2.1; +http://www.google.com/bot.html)" ) resp, err := client.Do(req) if err != nil { log.Fatal("Http get err:" , err) } if resp.StatusCode != 200 { log.Fatal("Http status code:" , resp.StatusCode) } defer resp.Body.Close() doc, err := libxml2.ParseHTMLReader(resp.Body) if err != nil { log.Fatal(err) } return doc }
fetch 函数和之前的整体一致,doc 是用 libxml2.ParseHTMLReader(resp.Body) 获得的。parseUrls 的改动比较大:
1
2
3
4
5
6
7
8
9
10
11
12
13
func parseUrls (url string , ch chan bool ) doc := fetch(url) defer doc.Free() nodes := xpath.NodeList(doc.Find(`//ol[@class="grid_view"]/li//div[@class="hd"]` )) for _, node := range nodes { urls, _ := node.Find("./a/@href" ) titles, _ := node.Find(`.//span[@class="title"]/text()` ) log.Println(strings.Split(urls.NodeList()[0 ].TextContent(), "/" )[4 ], titles.NodeList()[0 ].TextContent()) } time.Sleep(2 * time.Second) ch <- true }
可以说是经典的 XPath 写法了,看到就菊花一紧(bushi
htmlquery 如其名,是一个对 HTML 文档做 XPath 查询的包。它的核心是 antchfx/xpath ,项目更新频繁,文档也比较完整。
接着按需求修改:
1
2
3
4
5
6
7
8
9
10
11
12
13
14
15
16
17
18
19
20
21
22
23
24
25
26
27
28
29
30
import ( "log" "time" "strings" "strconv" "net/http" "golang.org/x/net/html" "github.com/antchfx/htmlquery" ) func fetch (url string ) log.Println("Fetch Url" , url) client := &http.Client{} req, _ := http.NewRequest("GET" , url, nil ) req.Header.Set("User-Agent" , "Mozilla/5.0 (compatible; Googlebot/2.1; +http://www.google.com/bot.html)" ) resp, err := client.Do(req) if err != nil { log.Fatal("Http get err:" , err) } if resp.StatusCode != 200 { log.Fatal("Http status code:" , resp.StatusCode) } defer resp.Body.Close() doc, err := htmlquery.Parse(resp.Body) if err != nil { log.Fatal(err) } return doc }
fetch 函数主要就是修改 htmlquery.Parse(resp.Body) 和函数返回值类型 *html.Node。再看看 parseUrls:
1
2
3
4
5
6
7
8
9
10
11
12
func parseUrls (url string , ch chan bool ) doc := fetch(url) nodes := htmlquery.Find(doc, `//ol[@class="grid_view"]/li//div[@class="hd"]` ) for _, node := range nodes { url := htmlquery.FindOne(node, "./a/@href" ) title := htmlquery.FindOne(node, `.//span[@class="title"]/text()` ) log.Println(strings.Split(htmlquery.InnerText(url), "/" )[4 ], htmlquery.InnerText(title)) } time.Sleep(2 * time.Second) ch <- true }
antchfx/htmlquery 的体验比 lestrrat-go/libxml2 要好,Find 是选符合的节点列表,FindOne 是找符合的第一个节点。


